
NestJS-Redox v2.x 
This NestJS module enables to auto-generate beautiful API docs using Swagger and Redoc. It supports NestJS 11, ExpressJS and Fastify.
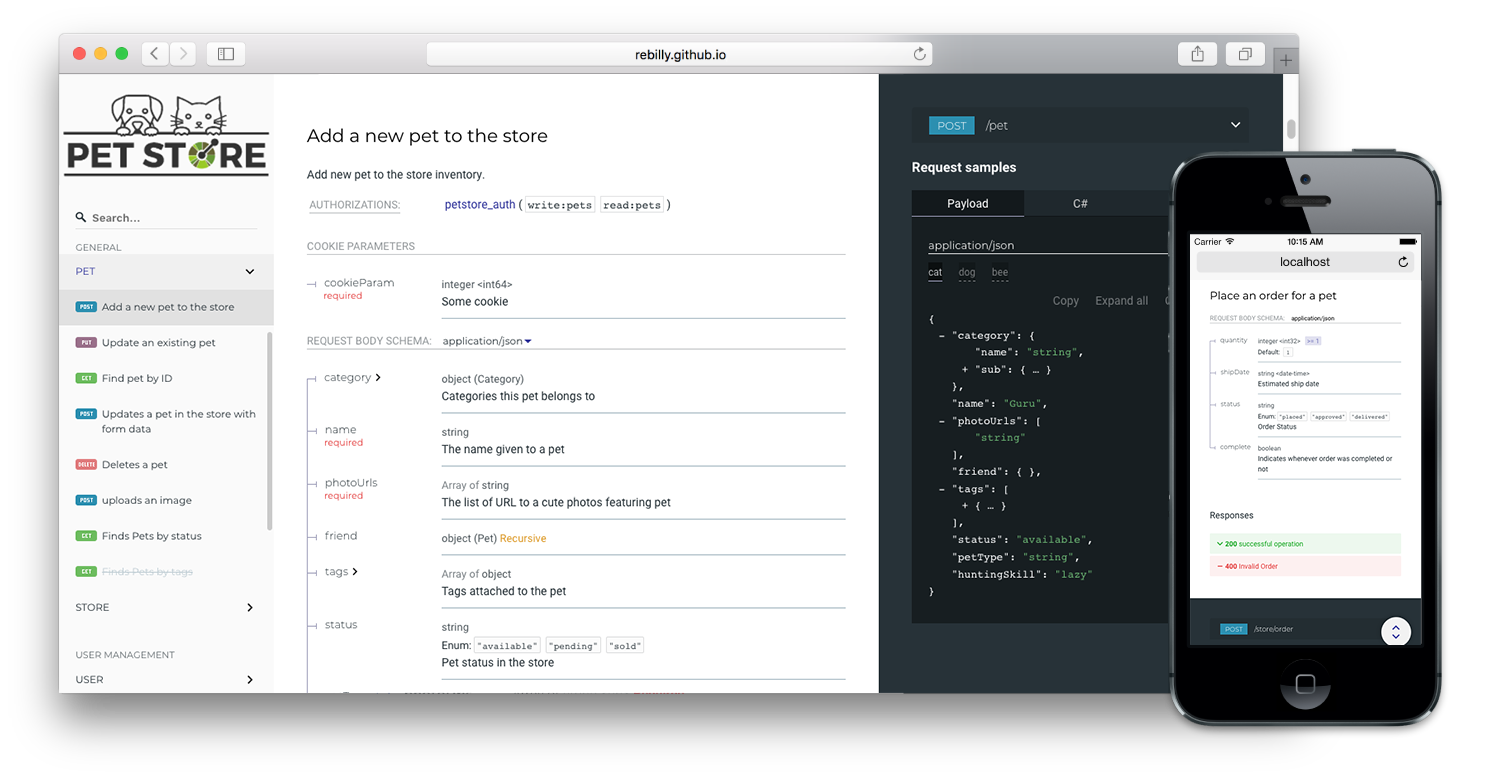
Features
- NestJS 11 support
- ExpressJS and Fastify support
- Multi-user auth basic support
- Option "standalone" for self hosted redoc bundles without requesting a CDN.
- Option to disable Google fonts
Using the "standalone" Option in combination with "disableGoogleFont" respects the user's privacy and allows to serve the API reference offline.
⭐️ If you like this package give it a star ;) ⭐️
Compatibility
| nestjs-redox | NestJS | |
|---|---|---|

|
v11 | More information |

|
v10 | More information |
Installation
npm install nestjs-redox
Standalone
By default NestJSRedox automatically loads the redoc bundle from a CDN. If you want to host it yourself, install redoc via npm install redoc and set standalone in RedoxOptions parameter to true. An additional fix replaces the redoc logo URL with a local saved image.
See chapter "setup".
Setup
In your main.ts file, before calling app.listen() insert the module setup (Fastify example more below):
ExpressJS example
import { NestFactory } from '@nestjs/core';
import { DocumentBuilder, SwaggerModule } from '@nestjs/swagger';
import { NestjsRedoxModule, NestJSRedoxOptions, RedocOptions } from 'nestjs-redox';
import { AppModule } from './app/app.module';

async function bootstrap() {
  const app = await NestFactory.create(AppModule);
  // ...

  const swaggerConfig = new DocumentBuilder()
    .setTitle('NESTJS-REDOX API')
    .setDescription('some description')
    .setVersion('1.0.0')
    .addBearerAuth()
    .addSecurity('roles', {
      type: 'http',
      scheme: 'bearer',
    })
    .build();

  const redocOptions: RedocOptions = {
    requiredPropsFirst: true,
    logo: {
      url: 'https://redocly.github.io/redoc/petstore-logo.png',
    },
    theme: {
      sidebar: {
        width: '222px',
      },
    },
  };

  const redoxOptions: NestJSRedoxOptions = {
    useGlobalPrefix: true,
    disableGoogleFont: true,
    standalone: true,
    auth: {
      enabled: true,
      users: {
        test123: 'test123',
        test: 'test',
      },
    },
  };

  const document = SwaggerModule.createDocument(app, swaggerConfig, {
    ignoreGlobalPrefix: false,
    operationIdFactory: (controllerKey, methodKey) => methodKey,
  });

  NestjsRedoxModule.setup('reference', app, document, redoxOptions, redocOptions);

  // ...
  await app.listen(port);
}

bootstrap();
Fastify example
import { NestFactory } from '@nestjs/core';
import { FastifyAdapter, NestFastifyApplication } from '@nestjs/platform-fastify';
import { DocumentBuilder, SwaggerModule } from '@nestjs/swagger';
import { NestjsRedoxModule, NestJSRedoxOptions, RedocOptions } from 'nestjs-redox';
import { AppModule } from './app/app.module';

async function bootstrap() {
  const app = await NestFactory.create<NestFastifyApplication>(AppModule, new FastifyAdapter());

  // ...

  const swaggerConfig = new DocumentBuilder()
    .setTitle('NESTJS-REDOX API')
    .setDescription('some description')
    .setVersion('1.0.0')
    .addBearerAuth()
    .addSecurity('roles', {
      type: 'http',
      scheme: 'bearer',
    })
    .build();

  const redocOptions: RedocOptions = {
    requiredPropsFirst: true,
    theme: {
      sidebar: {
        width: '222px',
      },
    },
  };

  const redoxOptions: NestJSRedoxOptions = {
    useGlobalPrefix: true,
    disableGoogleFont: true,
    standalone: true,
    auth: {
      enabled: true,
      users: {
        test123: 'test123',
        test: 'test',
      },
    },
  };

  const document = SwaggerModule.createDocument(app, swaggerConfig, {
    ignoreGlobalPrefix: false,
    operationIdFactory: (controllerKey, methodKey) => methodKey,
  });

  NestjsRedoxModule.setup('reference', app, document, redoxOptions, redocOptions);

  //...

  await app.listen(port);
}

bootstrap();
⭐️ **If you like this package give it a star ;)** ⭐️
Options
For supported options see Options.
Changelog
See Changelog.
Development
Clone this repository and run npm install. You find the library under libs/nestjs-redox and the demo apps under apps/demo-expressor apps/demo-fastify. Please run npm run format before commiting and make sure to use valid commit messages (see chapter Contributing).
E2E Testing
Run npm run test to run e2e tests.
Contributing
If you want to contribute please create a new issue with your feature request. When your issue was approved you can work on a PR. **If you created a PR without approval and we don't see a need for the PR it won't be merged. To create a PR fork this repository and send a pull request. The commit messages must be formatted after the conventional changelog angular theme. Following scopes are allowed: "nestjs-redox", "demo-express", "demo-fastify" and "project" for changes that affect the whole project.